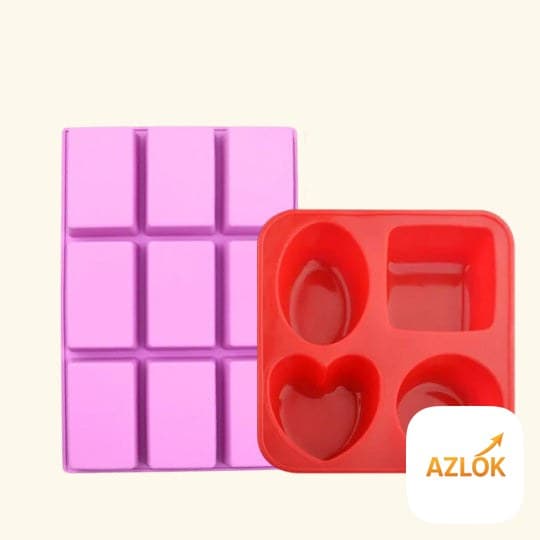
The Azlok 9 Cavity Rectangle + 4 Cavity Soap Mold combo lets you pour up to 13 soaps in a single batch, using flexible food-grade silicone that pops out cleanly without greasing or lining. It pairs a nine-cavity rectangular tray with a four-shape mould (circle, oval, square and heart), so you get everyday bars and pretty gift bars from one set.
What you get in the combo pack
This is a practical starter kit for anyone learning to make soap at home, and it holds up well for regular small-batch sellers too.
- 9-cavity rectangle mould (roughly 31 x 21 cm) that yields sturdy, uniform bars of about 140–170 g each.
- 4-cavity multi-shape mould (about 16 x 3 x 17 cm) with circle, oval, square and heart cavities, giving bars of around 120–140 g.
- Both moulds are made from flexible, durable silicone that is easy to clean and reusable for years.
Colours are assorted, so the shade you receive may vary depending on stock. That has no effect on how the mould performs.
What you can make with it
Silicone moulds are forgiving and work with most home soap methods. Popular uses include:
- Cold process and hot process soap from scratch, using oils and lye.
- Melt-and-pour soap — the easiest way to start, using a ready soap base you simply melt, colour, scent and pour.
- Massage bars and lotion bars made with beeswax, shea and carrier oils.
- Bath melts, wax tarts and small resin or plaster crafts.
The heart, oval and circle cavities are handy for festival hampers and wedding return gifts, while the rectangle tray is your workhorse for family-sized bars.
How to use the mould
- Prepare your soap. For melt-and-pour, cut the base into cubes and melt gently in short bursts. For cold process, blend your oils and lye solution to trace, then add fragrance and colour.
- Pour steadily into each cavity, filling to just below the rim. Tap the mould lightly on the counter to release air bubbles.
- Let it set. Melt-and-pour firms up in a few hours; cold process usually needs 24–48 hours before unmoulding.
- Unmould gently. Flex the silicone and push from the base — the bar should slide out without sticking.
- Cure cold process bars on a rack for 4–6 weeks so they harden and last longer.
Tips and safety notes
- No greasing needed — silicone releases naturally, so avoid oiling the cavities.
- If a bar resists, pop the mould in the freezer for 20–30 minutes, then flex again.
- Lye is caustic. If you make soap from scratch, wear gloves and eye protection, work in a ventilated area, keep children and pets away, and always add lye to water — never the other way round.
- Do the maths on cavity volume before pouring so you don't overflow; a small test pour with water helps.
- Wash with warm water and mild dish soap after each use; the silicone is easy to clean and does not hold odours if dried well.
Buying and storage
The combo is available as a single pack at ₹409, or in 5-pack and 10-pack bundles if you make soap in bulk or run a small business. Store the moulds flat or loosely stacked, away from sharp objects and direct heat. Silicone can pick up cuts from knives, so unmould with your hands rather than a blade. Kept clean and dry, an Azlok silicone mould will serve you through hundreds of batches.
FAQ
How many soaps can I make in one batch?
Up to 13 at once — nine rectangle bars plus four shaped bars (circle, oval, square and heart) from the second mould.
Do I need to grease the mould before pouring?
No. Silicone releases soap on its own, so greasing is unnecessary and can leave a film on your bars.
Is it safe for cold process soap with lye?
Yes, the silicone tolerates the heat and alkalinity of cold process soap. Just follow standard lye safety and allow the bars to cure fully before use.
How much soap does each cavity hold?
The rectangle cavities give bars of about 140–170 g, while the multi-shape cavities give bars of around 120–140 g, depending on your recipe density.
Can beginners use this mould?
Absolutely. It is beginner-friendly, especially with melt-and-pour bases, and durable enough for experienced makers who need consistent shapes.